Wow I can't believe that it has been almost a month since my last post. Well my Etsy shop has been open for a month now and I have been busy filling orders. I told myself that if I could get 4 orders I would be so happy and I have gotten over 10 orders so far. I would like to thank everyone who has supported my shop in any way. Even if it is just adding my shop or my shops items to your favorites. Besides being busy filling orders, work has kept me pretty busy with a bunch of end of the year renewals and other such nonsense.
I hope everyone had a great Thanksgiving, I know I did. Part of my Christmas present was a plane ticket down to Jacksonville, Florida to visit my Aunt, Uncle, and Cousin for Thanksgiving. They usually come up to St. Louis to celebrate, but for the last two years we have been going down there. (which is so much more fun 70 degrees as opposed to 32 degrees) Last year we drove down in a car too small to fit everyone comfortably so I needless to say I was more than thrilled to fly down this year.
I have been working on an awesome custom order and once I'm done I will post it.
Love,
RobbinZombie

Sunday, December 11, 2011
Tuesday, November 15, 2011
Update
Well my Etsy shop has been open for a little over a week and I have sold 2 stuffies, so I am more than excited. I am also creating a new stuffie to go into my shop and I still need to finish up that baby blanket that I feel will never end. So stay tuned for a new creation and here is a little hint of what I am working on.

Thanks,
RobbinZombie
Thursday, November 10, 2011
Halloween Part Deux
So like I was talking about before, me and Sasquatch have a few Halloween traditions. Every year we go to one Halloween party and that is Bill's Halloween Party. Bill is my best friends brother and his parties are always fun. This year Sasquatch was Michael Meyers and I was Raphael from Teenage Mutant Ninja Turtles we bought his costume and I made mine. I would have uploaded photos by now, but I didn't take any and the people who did have not uploaded them either. So here is a pic of my friends dressed up as The Real Housewives.

Yes, the one on the far left is a man, Gabe dressed as Countess Luanne, Sammie is Ramona, Alex is Caroline, and Michelle is Lisa. They are holding Snyder's Pretzels because they sponsor Watch What Happens Live and of course Ramona has her Pinot Grigio. The Halloween party was a lot of fun and I can't wait until next year. I just hope that next year Gabe doesn't drink too much and attempts to climb a tree, again!
Finally, on Halloween Sasquatch, me, and my best friend Erica handed out candy and watched horror movies. We decided to watch the original Fright Night since we not too long ago watched the remake in theaters (which was pretty good). I saw some really cute costumes and some costumes that looked like they just threw on something last minute (older kids, not from my neighborhood). We got a ton of complements on our pumpkins and I was just excited to relax, watch movies, and eat candy after working all day.
I hope your Halloween was as awesome as mine was. Now, I can't wait until next year because I will finally have my own house and I can decorate the crap out of it.
Love,
RobbinZombie
Saturday, November 5, 2011
Etsy Shop
Well I finally did it, I took the plunge and finally opened my Etsy shop. You can check out my creations at FreakyCuteKreations.etsy.com, now I'm just scared that no one will buy anything. Well to entice people I have created a coupon for free shipping until November 12th. The coupon code is Nessie so at the very least check out what I put in there and maybe tell your friends about it. Thank you for your continued support and now I need to go create some more creatures to put in my brand new shop, excited.

Love,
RobbinZombie
Wednesday, November 2, 2011
Halloween
Sasquatch and I have been together for over 3 years and our favorite holiday is Halloween and because of this we have a few traditions. Every year we go to at least one haunted house, we carve pumpkins, we go to Bill's Halloween Party, and if Bill's Halloween party is not on Halloween we hand out candy and watch horror movies. Sadly, this year we did not have the time to go to the pumpkin patch and ride the hayride and pick our pumpkins from the field like we usually do. So we went to our friendly local owned garden shop and picked the best pumpkins we could find. Last year I did The Stay Puft Marshmallow Man from Ghostbusters and Sasquatch did Michael Meyers. This year we did these.

Sasquatch loves Ghostface, and after doing Michael Meyers last year and Freddy the year before, it only seemed fitting.

I of course did Jaws. As soon as I saw the pattern I didn't need to see any others. I love Jaws so much I seriously watch it all the time and never get tired of it. I loved that it was basically the movie cover with Jaws coming up from the bottom to eat the woman swimming on the surface. Pumpkin Carving checked off the Traditions List.
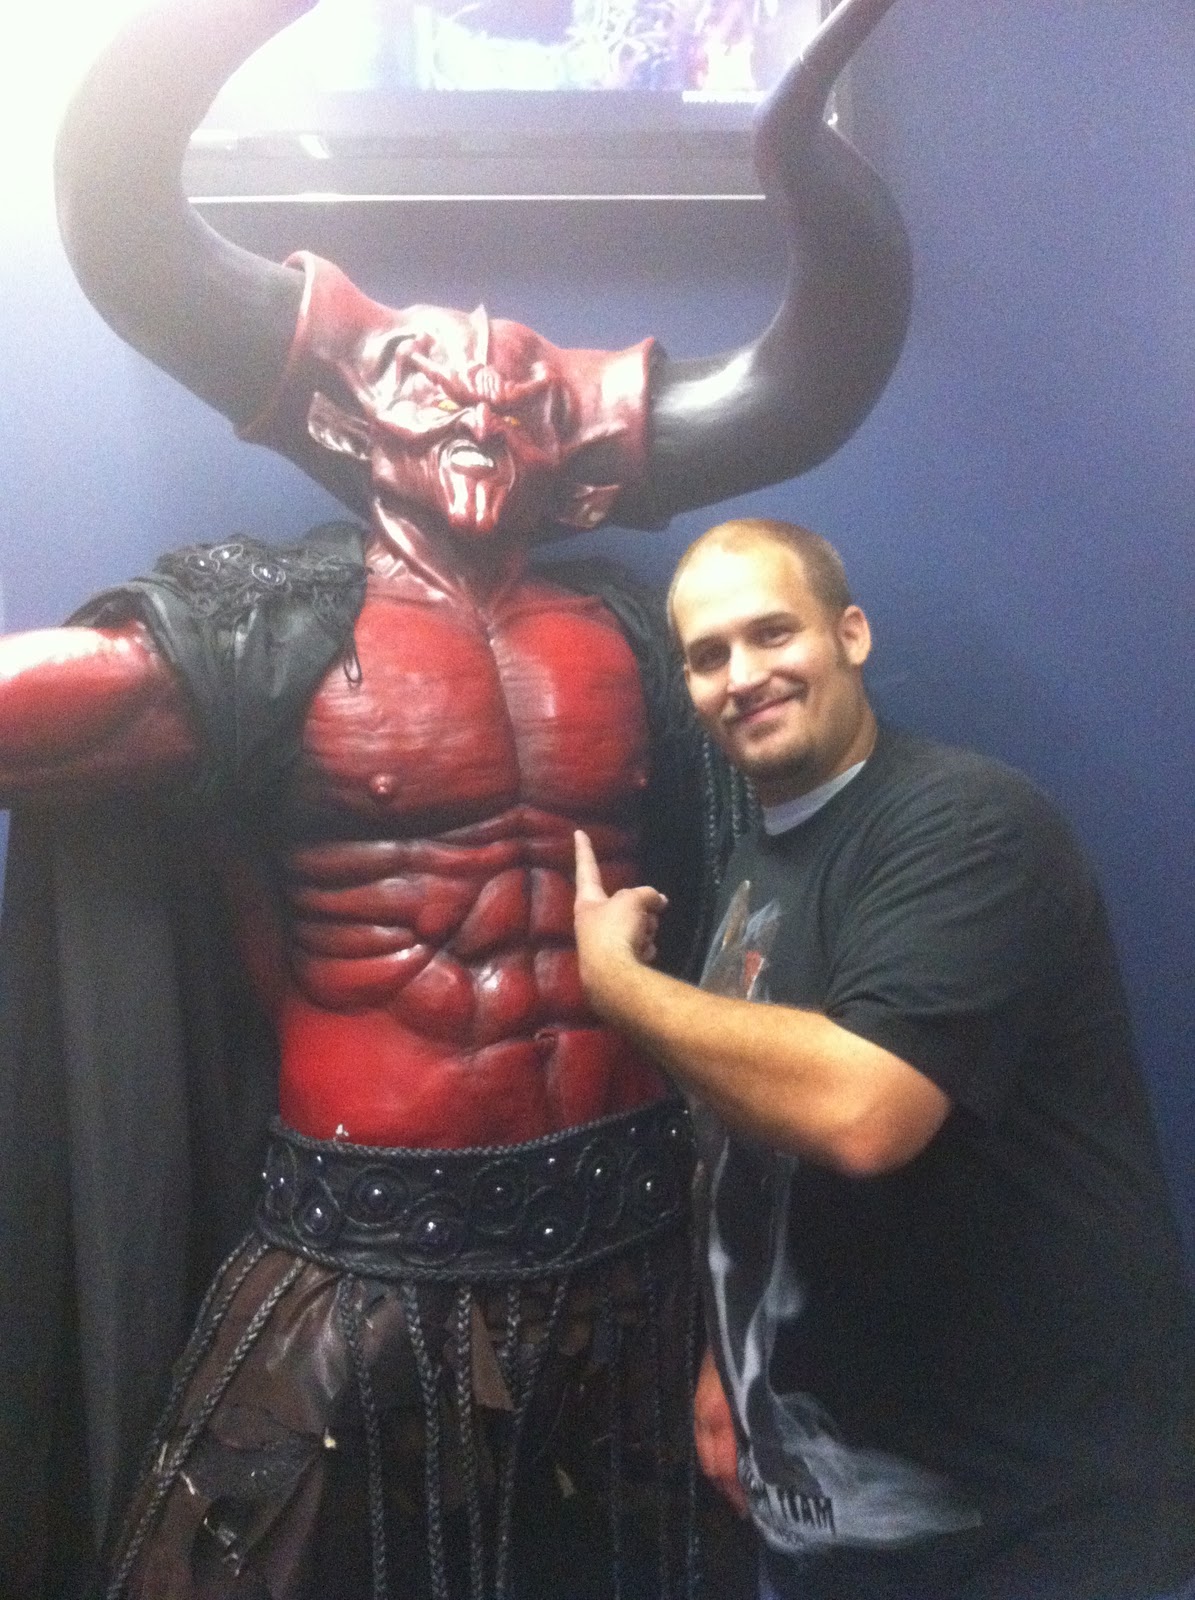
Last weekend we went to The Darkness with Brandon, his girlfriend Jessica, and Paul. I love The Darkness it is rated one of the best in the country, what I like about it is it is long so I feel like I am getting my monies worth and the scenes in the haunted house are awesome, they literally have a scene for every scary thing you can think of i.e. butcher shop, morgue, swamp, etc. It is basically 2 haunted house in one because they have a 3D section at the end with black-lights and 3D glasses, if you hate clowns then the 3D part is for you, it is all fun house/carnival/circus themed. When the haunted house is over it leads you to the monster museum, which has old toys and status of famous creatures like The Creature from the Black Lagoon, Predator, even Satan...
Haunted House crossed off Traditions List.
Stay Tuned for Halloween Part Deux
Love,
RobbinZombie
Tuesday, November 1, 2011
Craftster Hoodie Swap
Well, the Hoodie Swap is finally over, I sent Errka her hoodie last week so she should have either received it yesterday or today. I always love doing the Hoodie Swap because it gives me a chance to paint, which I don't do very often and it gives me a kick-ass hoodie to wear. So I received my Hoodie from Errka on Friday. I don't remember what themes I put down, but this is what I received.
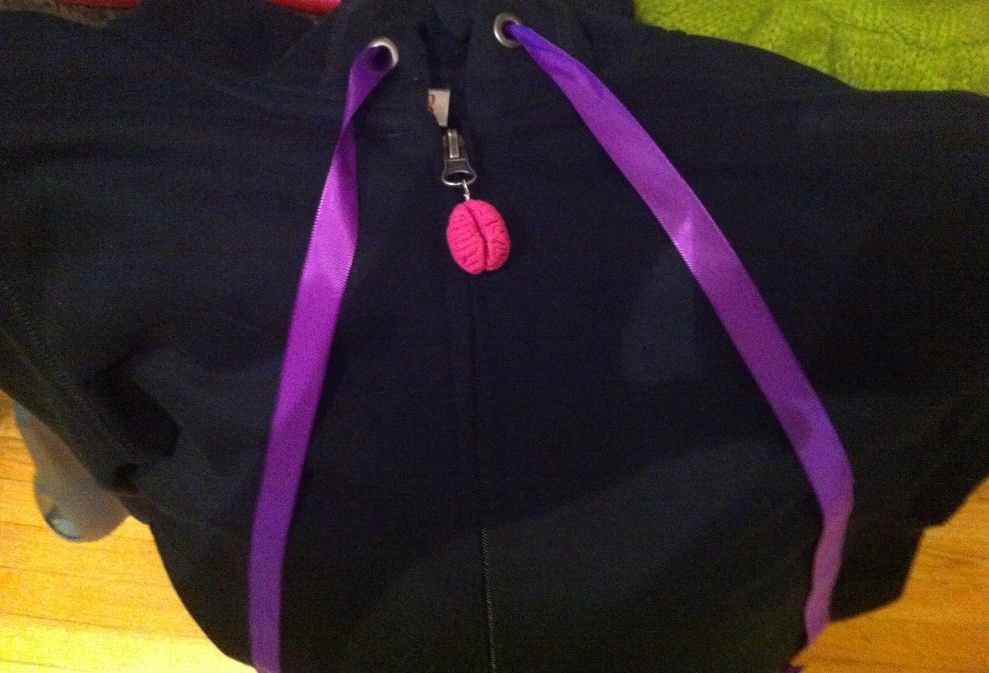
Brain Zipper Pull and super long purple ribbons for the hood.

On the back is the coolest Zombie Cupcake Creature, needless to say I really haven't stopped wearing it since I got it.
I sent this

The rope around the picture on the back of the hoodie didn't come out as perfect as I wanted it to, but it didn't turn out to bad for freehand. As you can see I HAD to add a shark fin mostly because I LOVE sharks and because it added to the painting. I hope she loves it and I can't wait to hear her reaction.
Now that I have finished all my swaps the only thing left is to finish my friend's sisters baby blanket and get my Etsy shop up and running. I want everything to go as smoothly and as perfect as possible and I want to have enough different creatures to choose from and I think that is part of the reason why it is taking me so long. I would rather it take me a little longer and people to actually order my items then to just toss up a shop put in 3 creations and hope for the best. I think it is also because I graduated with a business degree, so I'm trying to do it right and have my logo done and my stock up and ready. So hopefully very, very soon you will actually see my shop up and running and *fingers crossed* hopefully buy my creations.
Love,
RobbinZombie
Thursday, October 27, 2011
House/Halloween Update
Yup, so I called my Dad and asked him if he would do an inspection on the house I liked because we were considering putting a bid down. My Dad is a firefighter and does construction on the side and well he got to the house and called to tell me that he had gone on 3 OD cases within 3 blocks of the house and that about 3-4 blocks away was a big Heroin area. So needless to say that house is no longer on my list.
The good news is I pretty much finished my Halloween costume. October for some reason is always a very busy month for me, so I usually just wear what I want from my closet. Basically, I half ass my Halloween costume because I'm not paying $50 + dollars for a costume and for a "Sexy" one at that. Well this year I was thinking about buying, but I really couldn't find one I liked and when I did I didn't want to show that much skin. New this year is a Sexy Ninja Turtle costume, but I hated the sleeves and they didn't have my size so I decided to create my own Ninja Turtle costume. I will be posting pictures of it soon.
Love,
RobbinZombie
Monday, October 24, 2011
House Hunting Catastrophe
For the past 3 weeks or so I have been house hunting. It all started with a house I liked and wanted to go see, well the realtor owned the house so he insisted that I get pre-approved for a loan before I could see the house. So I jumped through some hoops and got pre-approved by not 1 but 3 different agencies, if you are going to do something you should do it right ;). Needless to say I hated the house, it was 1000sqft but as soon as you walked into any room in the house you were pretty much halfway out of said room meaning tiny tiny rooms. Since I had been pre-approved and saving up for a down payment I figured I already started this house hunting process I might as well finish it. So I began looking for other houses and calling up the realtors and looking at said houses after work. I had been trying to resist getting a buyers agent because I didn't think I really needed one and well I'm stubborn and like to do things on my own. Well, last week a realtor cornered me as I was walking through a house and was aggressive in trying to get me to allow her to be my buyers agent so that made me think "maybe I do need a buyer's agent" and then last Sunday I made an appointment to go see a house and the realtor asked if I would like to see some of his other listings in the area I figured why not, until I found out that the listings were like $10,000 out of my budget. He might have thought he could trick me into falling in love with a more expensive house, but he didn't realize that I am SO much smarter than him. I called him back and told him the one house would be fine and I didn't need to see any others. After those two incidents I decided to contact a friend of my moms who is a realtor for over 30 years and could be my buyers agent.
After combing through about 80 listings we decided to go see 9 houses this past Saturday and let me tell you some of those house were scary. I'm talking warped floors, carpet hiding warped floors, dungeon like rooms in the basement, etc. When I was telling my Grandma about each house I kept ending it with "but that wasn't even the worst one" because I would then remember another one that was worst.
The first house we saw had a front yard that had had an almost 90 degree angle, the only thing you can do with that is try not to kill yourself mowing it and put up a retaining wall, which of course can be expensive. The living room had this awful 80's mirrored tile on the wall, the kitchen never left the 60's in a bad way and the bedrooms were so small that I would have to put my bed in one and make the other into my dressing room. Oh and there was a room in the basement that looked like a serial killer lived in it. It also needed way to much work, I know that for my budget which isn't a bad one I might have to get one that needs a little love, but there is a BIG difference between a little love and a whole hell of a lot of love.
The next house had mega warped floors and the scariest bathroom i have ever seen in a house, it was so bad I took a photo.

It looked worst then a public restroom in a public park. I laugh at this photo every time I see it, mostly because I can't believe this exists. Needless to say I let that house go.
The next house had puke green shag carpet going up the stairs to the second floor and huge cracks in the walls because the whole left wall of the house was detaching from the rest of the house, um get me out of here now, before we die.
The next house had asbestos tiles and my buyers agent jokingly said "if you paint them you'll be fine, just don't pull them out" of course all I could see was the little girl in American Horror Story saying "you're going to die in this house." So the death trap house was a no.
The next house I actually really liked, it had all the good things about South City houses, beautiful multicolored brick house with recent tuck-pointing, beautiful hardwood floors, glass blocks in the bathroom window, and stained glass windows. The only work it needed besides painting was the front stained glass window needed to be replaced because it was letting water in, so there was a little water damage under the window (the inspector can tell me if it is worst than it looks, hopefully not) and the concrete stairs on the porch needed to either be redone or patched. Oh and it needed a little sanding and painting on the windows and trim outside. This house is currently #1 on my list, if I can get the house awesome if I can't then it wasn't meant to be. I'm trying to not totally fall in love with any house because you never know what will happen.
The next house the hardwood floors looked like they spilled beach everywhere, the bathroom was awful 80's gross, and so was the fireplace. Oh and in the bedroom of this "vacant" house was a blowup mattress and an alarm clock so who know if someone is still living there. Finally the finale was the second bedroom was in the basement. Basically, they built a room randomly in the middle of the basement it was platformed up (probably because the basement still leaks) awful blue carpet, oh and the ceiling in this "bedroom" was about an inch taller than me, I'm 5'5'' and Sasquatch is 6'2''. Sorry to say that house was a hell no, mostly because they also covered up the stained glass windows to create a closet and of course to hide the mega water damage in the corner.
The rest of the houses were not as bad as the ones mentioned above, so I won't really go into detail, but none of them I really liked.
My grandparents were out of town until Saturday night so they could go with me to see the houses and since my grandpa has dubbed himself my "personal buyers agent" (My grandpa has bought many houses before for the housing corp. to fix up and resell so I trust his judgement) I took him over to the house I did like on Saturday to show him the outside and to look in the windows. My grandpa really liked the the house and told me to put an offer down, once I hear back from Fred my buyer's agent to make sure there isn't anything that would prevent me from getting the house. So fingers crossed.
Love,
RobbinZombie
Tuesday, October 18, 2011
Creepy Cute Joker Nugget
So between working on a baby blanket for my friend's sister, working on the hoodie swap, and house hunting I have created a Joker Nugget. Lately, I have been crazy busy house hunting it is almost like having another full time job, but I am enjoying it so far, but I haven't found the right house yet.
Last week when I had sketched out the Joker Nugget in my new sketchbook, I knew that was going to be my next project because I always have to have 3+ project going at once in case I need a change (or because I'm crazy ;) ).

So I went to the craft store last weekend and bought a bunch of different colored felt to create a number of kreations including The Joker. I modeled him after the Health Ledger Joker with a little inspiration from the comic book Joker.

I decided on a light purple shirt, dark purple pants, and a green tie and vest. I wasn't sure at the time how I was going to do the hair, but I just figured I would wing it and if I didn't like it then I would try something else.

For the face I decided that I was going to recreate the scars with a little sewing, I know in this photo they are hard to see, but they look very similar to the scarring the Health Ledger had. I decided to use oil pastels to recreate the make-up, I think I might go in with another red to try and make it a little more dark red, but it could also be the lighting in this photo.
For the hair, I decided that I would try something new. When I was looking up photos to model the Nugget after, I noticed that yes there is green in his hair, but is almost looks like it is washing out so I decided to lightly paint individual pieces of hair and glue them into place to not only get the stringy effect of the hair, but the green fading and the blonde showing through. I still haven't decided if I like the hair, but it does give the effect I wanted. He does look a little happier than I wanted, but I'm sure that's because he just did something very bad, who know what I will walk into so I must keep a very close eye on him.
What do you think?
Thanks,
RobbinZombie
Thursday, October 6, 2011
What I've Been Up To
Lately, it seems I have been working on a bunch of random things. I have the hoodie swap that I am currently doing, papercrafts, and working in my sketchbook.
The hoodie swap is going great so far, I forget how relaxing it is to paint. My partner, Errka requested among many themes Old School Sailor Tattoos which I of course picked instantly. Here is a progress shot so far.


I am painting directly on the hoodie with regular craft paint, but I have added textile medium to it so that she can maybe one day wash it. I have found that when you are painting on fabric especially hoodies, you need to do a couple of coats to layer up the paint so that you can smoothly paint and get the effect you want, which is also why you see the crazy blue and gray. I have plans to paint two other designs on the front, one on the left breast area and maybe one on the pocket. This is my second time doing the hoodie swap and the second time painting on a hoodie. The last hoodie swap I painted it so that when my partner wore it, she was a zombie with exposed brains, ribcage and anatomical heart, spine, and arm bone (there are pictures somewhere on Craftster of it). I am still working on my painting skills especially since I really haven't painted anything since high school, but I think I should paint more.
The second thing I have been working on are these fun folding paper monsters.

I had seen a review on Papertoy Monsters on one of the many blog I read and paper craft toys have interested me for a while, so I decided that when I saw this at my local bookstore, I had to buy it. What I love about this books is that you just punchout the design, fold, and glue, no need for cutting. The only thing about that is those tiny little tags that are left over from where it was attached, but they don't really bother me.

The first one I did was a take on The Blob, I had it make him especially with the awesome tongue. I figured this was another crafty thing me and Sasquatch could do together. He of course called me a dork when I showed him my purchase and our new monster, but I know he's excited to make some ;).
The last thing that I have been working on is my new sketchbook. The only time I have ever really used a sketchbook was to do my sketching homework for art class. I never found the need for one until I started creating my own patterns and creations. I have a tendency to doodle and draw my new creations on any random paper I can find, but then I sometimes lose or end up crushing my sketch. So I decided the other day I should get a sketchbook so that I can sketch the creations I want to make and so they are all in a safe place and then of course use notepads to draw out my patterns and cut them out. I love using legal sized notepads because they are long so I don't need to tape two pieces of paper together (most of the time) and they hold up to pinning and multiple uses. Now I just need to put all those patterns in an extendable folder I have so I don't lose them. I don't have a picture of it, but the first creation I sketched in my new sketchbook was a Joker Nugget, Health Ledger style. I think it turned out pretty well and maybe soon I will start working on it.
Thanks For Listening.
Love,
RobbinZombie
Tuesday, October 4, 2011
Halloween Ceramics
I have been housesitting for the past couple of months and this week their internet decided that it really didn't feel like working, but hopefully I fixed it.
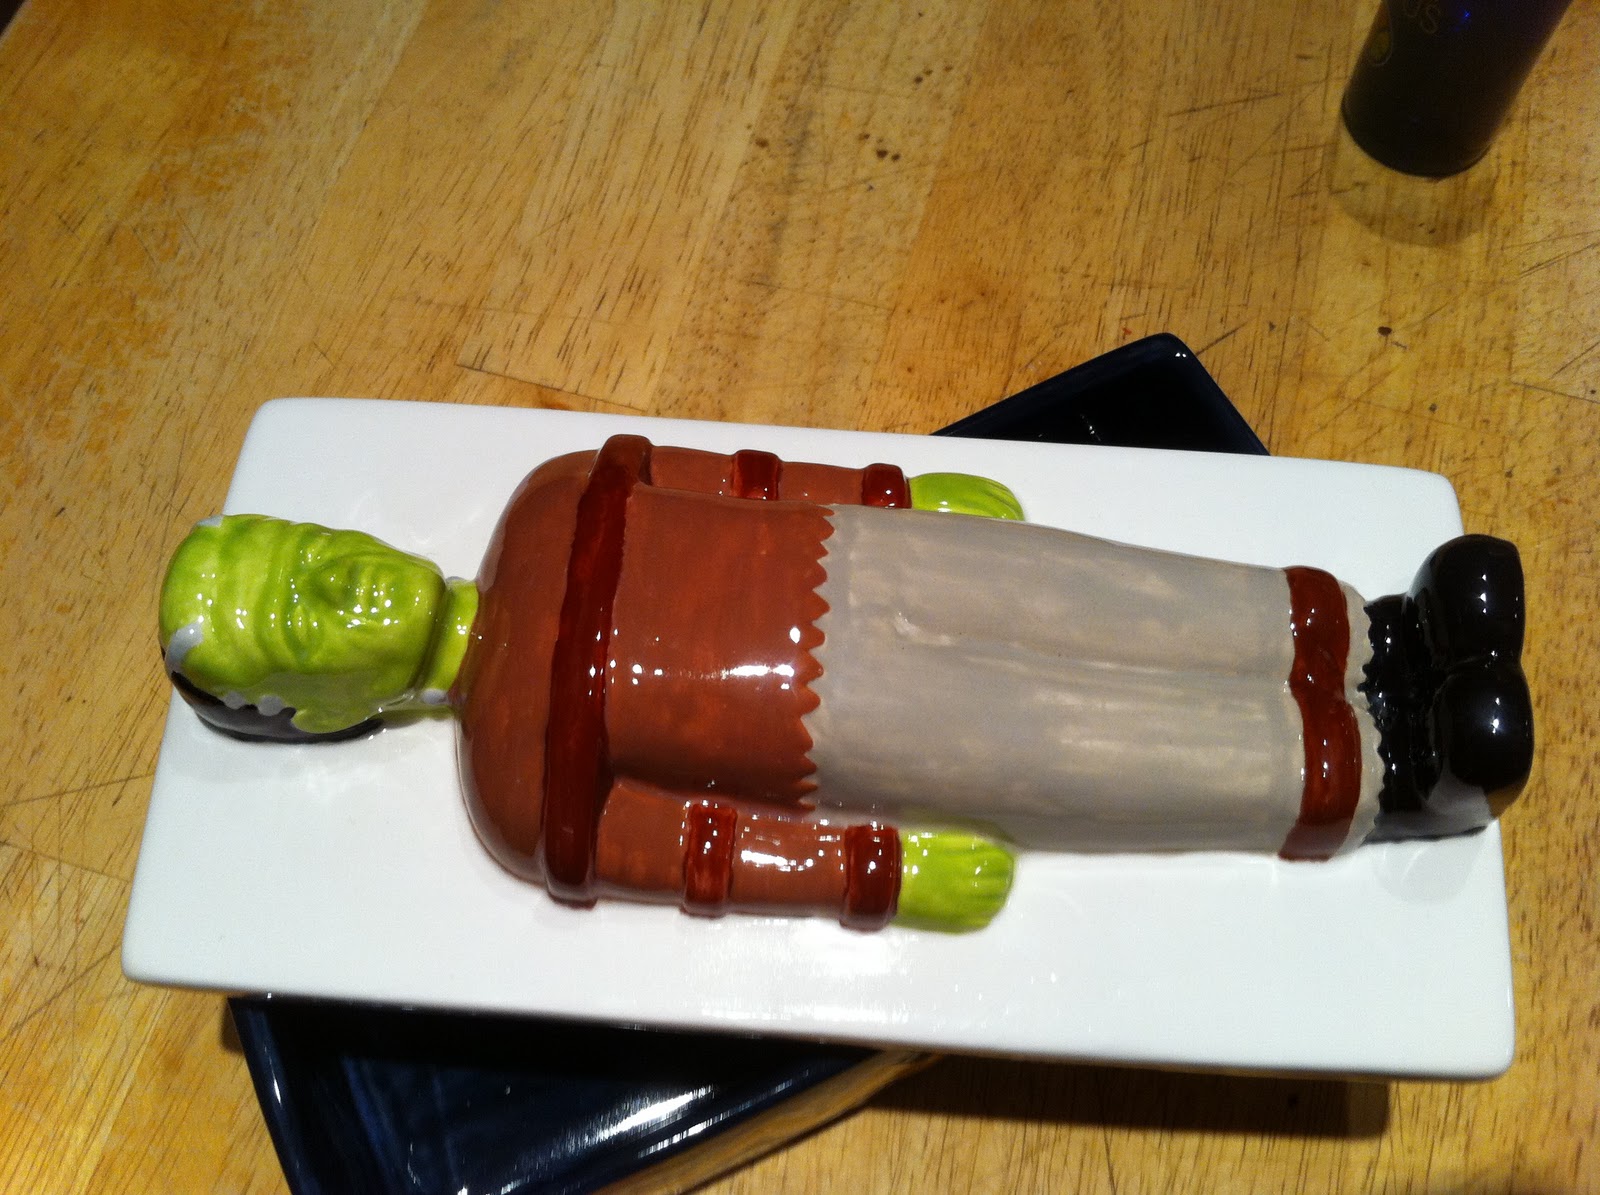
Last weekend Sasquatch and I decided it was time to go to our friendly neighborhood pottery painting place and paint some pottery. Our favorite place to go it Baked Goods Pottery on Gravois in St. Louis, MO, they are very friendly, fun to talk to, and we love their selection. We decided to go because I had received their newsletter letting me know that they had received their Halloween pottery and we LOVE Halloween so it was perfect. When we first went to Baked Goods about a year and a half ago I wasn't sure if Sasquatch would really enjoy it, but he loves doing it. In the past we have done gnomes, dinosaurs, etc and this time we decided we would do these:


Sasquatch did Satan and I did Frankenstein. It was funny because Sasquatch took the longest time to decide what he wanted to do, until he saw the "Tommy Lee Jones" Satan (Doesn't he remind you of Tommy Lee Jones?) Besides Satan they had a witch, a skeleton, a pumpkin man, and death figures to paint, they were a little creepy and a lot awesome.
Get ready for a lot more Halloween posts because lets face it Halloween is in fact the best holiday EVER!
Love,
RobbinZombie
Monday, September 26, 2011
Cthulhu - The Cutest Elder God
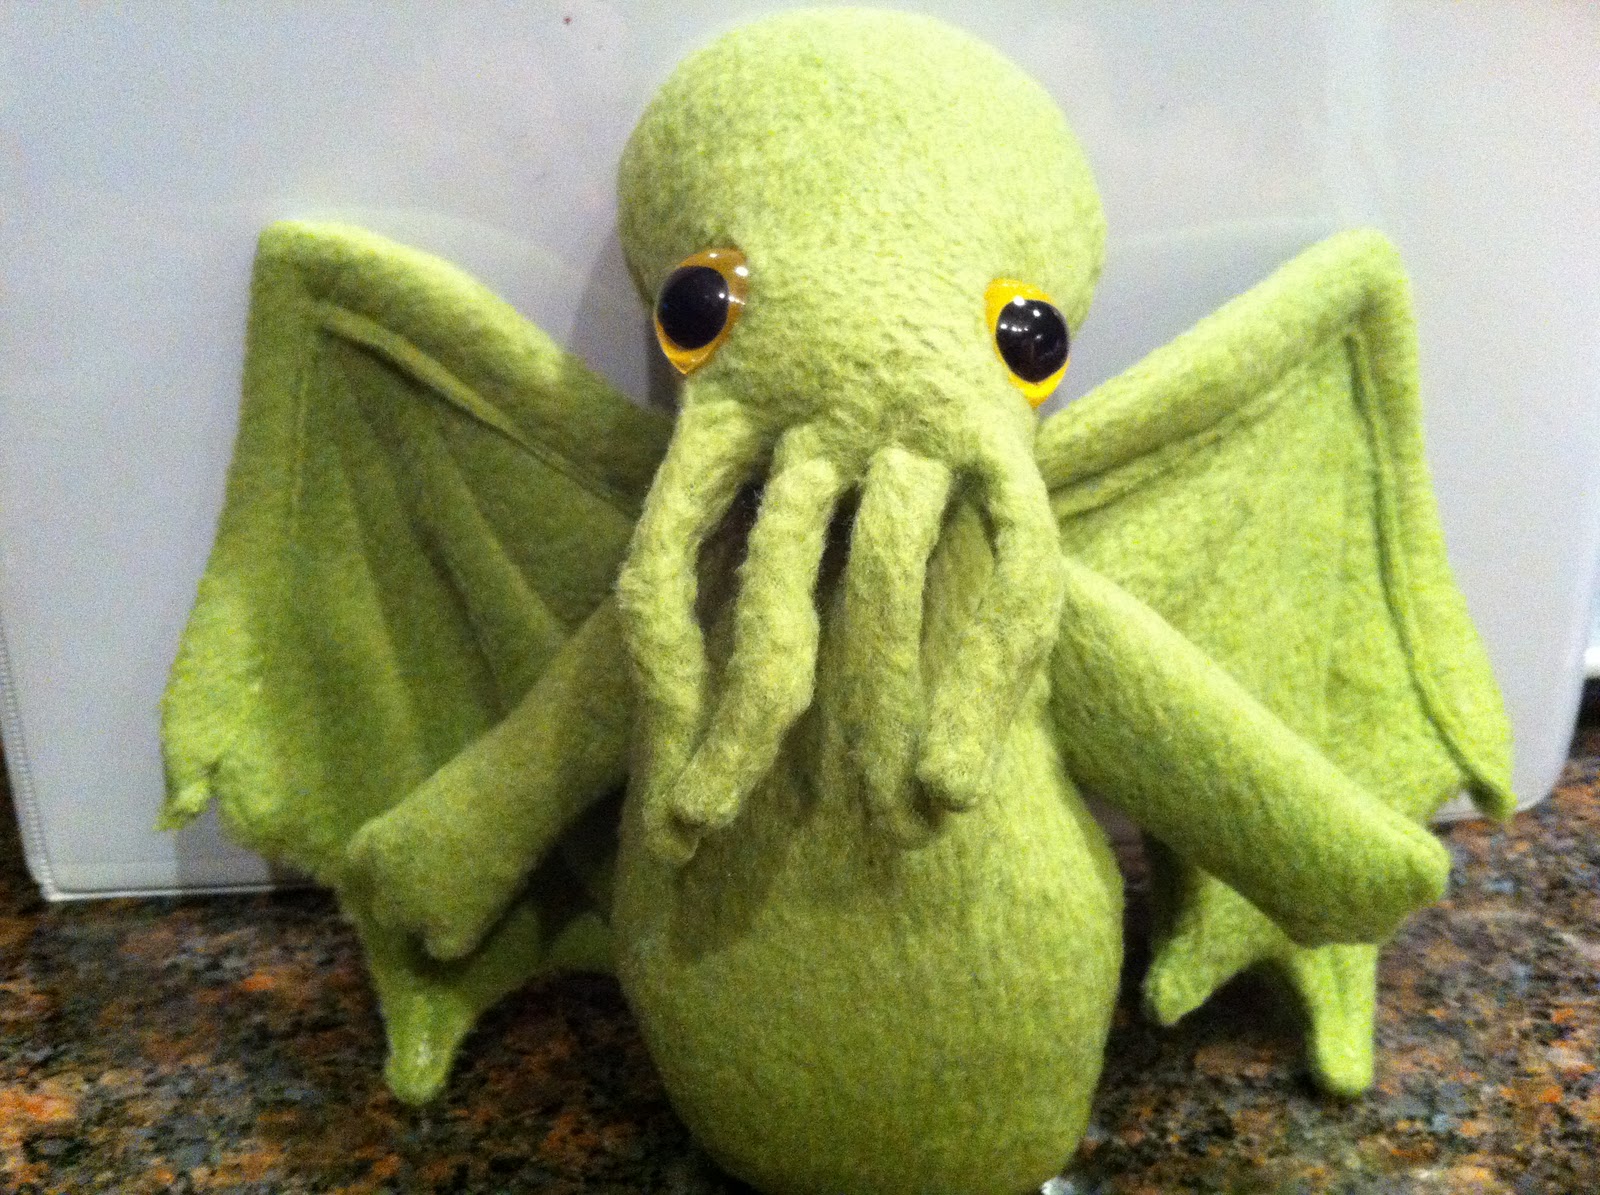
So after about a week, Cthulhu is done and I'm excited. I have been wanting to create one for a while, but I wasn't sure how I wanted to create it. So the other day when I made a Toothless Dragon for my best friends birthday I know I could take (bought the pattern because I waited until the last minute to make the gift why reinvent the wheel) what I learned from creating Toothless and use that to create a Cthulhu.
Every time I create a new pattern I learn new things and that is why I love making stuffies. I love that I can continue to learn and grow and continuously get better.

I put wire in the top of the wings and the tentacles to allow for different movement and to add to the overall affect.

I really love this side shot because so can see the head profile and his cute belly. I was going to give him legs and feet, but I decided that I like him better without. He is about 7 inches tall and 9 inches wide. He was a lot more hand-sewing than I normally do, but as long as he turns out he way I want I could care less if I hand-sew the whole thing. I was going to give him green cat eyes, but I could only find 1 in the size I wanted, so when I tried the yellow ones I was glad I didn't just pick the green and not try anything else.
I hope you love him, because I sure do. I hope he brightened your day.
Love,
RobbinZombie
Sunday, September 25, 2011
Update
So I have finally finished my Mini 13 Days of Halloween swap and guess
what? I forgot to take any photos, Oh Well. I needed to really buckle
down and finish that swap which is why I have been away for a week and a
half. Currently I am working on a new project, but for some reason my
sewing machine has been acting up when I work on it. I thought I was
going to be finished yesterday to show it off, but sadly it is not but I
have taken a progress photo to show you what I am working on.

I hope my sewing machine starts working right, because I really want to finish this because so far I love how it is turning out.
Thanks,
Morgan
Wednesday, September 14, 2011
Han Bacca/ Chewsolo Part Deux
I know that I haven't been posting a lot lately, I have been sick (blah) and busy with a swap that I am doing. I would post the pictures of what I am making for the swap, but I don't want to ruin the surprise if my partner is reading my blog (sorry Calabaza no spoiling the surprise).
When I originally created the Han Bacca it was for a weird stuffie swap. I fell in love with him so much that I had to create one for myself (and maybe add it to my upcoming Etsy shop). I did a few things differently, like instead of the belt being sewn on I glued it on after the fact just a few little things like that to improve Chewsolo.

I almost forgot the red stripe down the side, but it's OK Star Wars fans I caught my mistake, I try and keep my creations as true to form as possible.


I just love Chewy's Fuzzy face and Hans hair, very 70's and very AWESOME

He is made with a combination of Felt, Fleece, and Fun Fur. The more I use Fun Fur, the better I get at using it, because trust me Fun Fur can be evil. The pattern is of course my Nugget Pattern, I am still not tired of using it, I have plans to make an Admiral Ackbar in the future.
I am glad that I finally sat down and created another Han Bacca/Chewsolo. I hope it brightened your day.
Love,
RobbinZombie
Wednesday, September 7, 2011
Shark Night 3D and a little Update
This post was suppose to be posted on Sunday, but I woke up so dizzy that I could barely get out of bed so needless to say I did nothing on Sunday and then Monday and Tuesday I really didn't feel good at all. I finally feel good today, so today we will be talking about the Awfully Awsomeness of Shark Night 3D.
When I saw the previews for this movie I was confused as to why is wasn't on the SyFy Channel and why it was actually coming to a theater near you. Then I remembered Piranha 3D and had an "OH" moment, they were basically making another awful awesome scifi movie in 3D for this summer, like they did last summer (Jumping on bandwagon).
First of all I love all those cheesy SyFy channel movies that look like they were made with about $100 dollars or the ones with the $200 budget that stars Tiffany (she was popular before I was born, so I don't really know who she is). I love how bad the acting is and how bad the CG is, basically they helped me spawn the term Awfully Awesome which describes something soooo awful that it is in fact awesome.
If you are going to see Shark Night you have to see it in 3D, they use the 3D effect to their advantage and it actually makes it a little scarier and makes you jump a little more. Unlike other scifi movies the monster isn't on a rampage because it was trapped and is now awakened, it is not an experiment gone wrong, or a government project gone wrong. When they do reveal why the sharks are in the lake you're almost like REALLY that's what you came up with. The movie is only PG-13, but the gore is pretty good for that low of a rating, just know you will have stupid tween in the movie theater with you, in mine they wouldn't stop talking to the screen out loud and whistling at the bikini butt shots even though we went to the 10:00pm showing. If this was a rated R movie there would have been boob shots, but because it was rated PG-13 there were a lot of butt shots to make up for that fact.
Overall the movie is entertaining and does its job, it is scary, it is gory, and overall it wasn't bad. Now paying $13 a person to see it was a little high, but it needed to be seen in 3D. I hope this post was entertaining enough for you especially since it is free, I hope to finish another Han Becca/Chewsolo soon and post it here.
Thanks,
RobbinZombie
Wednesday, August 31, 2011
Don't Be Afraid of the Dark (Movie Review - Sort of)
When I heard that Don't be Afraid of the Dark was coming out, I was interested to see what it was about because I LOVE a good horror movie. Once I heard that Guillermo del Toro had something to do with it I knew I had to see it. Del Toro is known for directing, writing, and/or producing Pan's Labyrinth, Hellboy I & II, and The Orphanage, just to name a few. I'm sure you can tell from some of my creations that I LOVED Hellboy I & II and if you have not seen The Orphanage you should, you do have to read subtitles, but trust me it is very good. Anyway back to Don't be Afraid of the Dark. From the previews I could tell that it had the same style and camera angles that del Toro loves to use and he wrote it so I knew it was going to be good. I know that it is a remake and I tend to shy away from remakes because sometimes they just suck, however I never saw the original Don't be Afraid of the Dark so I had nothing to compare it to. The story is different from the original and and think the idea is better, int he original the main character is a woman, where in the new one the main character is a child, which automatically makes the audience feel like a child stuck in a horror movie and can't get out, basically the movie makes you feel like a scared kid and that works. I loved the intro into the movie I love when they are introducing the writers and directors in the beginning and you see words and notes and photos flow through the background. This technique is being used more and more often and I love it because if you can read fast enough you will get a little insight, like in the beginning you can get a little insight into the creatures.
What I liked about the movie was you didn't have to wait until the end of the movie to finally see the creatures, del Toro showed a little bit of them at a time, until finally you saw them. I also loved the care he took with fairy lore. In fairy lore when you are in an area where fairies are located, that is identified with a circle made out of mushrooms. When I saw the circle of mushrooms I was excited because I wasn't sure if the were a type of fairy or just some crazy creature.
The actors were very good especially the little girl Bailee Madison. I am not a big fan of Katie Holmes, don't know why, but I'm just not, but her and Guy Pierce were awesome. I pretty much loved everything about this movie, the visuals, the story, the actors, the ending. I would definitely recommend it to anyone and especially to those who love horror movies.
This weekend Sasquatch and I are going to see Shark Night 3D (Love shark movies) interesting to see that it is NOT a Syfi channel original movie, but that it will actually hit theaters. So stay tuned for my thoughts on Shark Night 3D, oh and yes we are going to pay the $3 to see it in 3D and that excites me even more.
Love,
RobbinZombie
Saturday, August 27, 2011
What Has Three Eyes and Two Noses? Two-Headed Kitties!!!!

I have always loved oddities, especially animal oddities, such as animals with an extra limb, head, etc. Which is why whenever I am in a location with a Ripley's Believe It or Not Museums you better believe I am going to visit it. So when I first dreamed up the cyclops kitty I knew that my next project would have to be a two-headed kitty.

I wasn't really sure how it was going to turn I because I took two heads and sewed them together, but I think it turned out perfect. I admit I am one of those people who says "lets just see how this goes, I can always fix it if I don't like it." So far the mantra was worked very well for me.

I love that each head is different, the one on the left is bigger than the right and fuller. Where the head on the right is pointer and the mouths are different too. I'm really glad they turned out differently because it really shows that just because they share the same body, doesn't mean they are the same kitty.


As always I hope you enjoy my creations as much as I enjoy making them.
Love,
RobbinZombie
Sunday, August 21, 2011
Cutest Jackalope
I love everything having to do with Cryptozoology. My tops favorite crypids are Bigfoot, Yeti, Nessie, Jackalope, and Chupacabra. I have made both the Bigfoot and the Yeti so I decided that the next crypid I was going to make was a Jackalope. My favorite part of the Jackalope has to be the antlers. I just love how the antlers make a rabbit very whimsical, especially this one.

I was afraid that the antlers would not turn out right, but they turned out better than I thought they would.I was afraid that they would turn out more 2D than 3D, but after stuffing them FOREVER, I think they turned out amazing.

I also love the cute puff ball tail, I crocheted a ball and combed it so that it would be fluffy (it's so fluffy I could die). I also love the little spot of white under is chin, I don't have any pictures of it right now, but it is pretty cute.

With this pattern I also made the legs attached to the body as one piece, it was a little more complicated than the kitty pattern, but in the end I figured it out. This Jackalope will also be available in my upcoming Etsy shop.

I hope you guys like him as much as I do.
Thanks,
RobbinZombie
Thursday, August 18, 2011
The Whimsical Mind of a Child
Up the street from my house lives a family with two little girls who I believe are ages 8 and 6. One day while walking my dog back in April we were passing their house and out of the corner of my eye I saw this.

I took this picture yesterday because normally when I am passing this I am walking my dog, which mean I could never hold Riley and take pictures at the same time. Yesterday Sasquatch and I were taking a walk and I happened to have my phone on me so I decided to take some photos for you guys. Back in April when I first past this fairy house it was just a door and the fairy you see on the right, since then it has blossomed into this awesome home that any fairy would love.

The stick with the tape use to be a little archway they made themselves.


It is always fascinating to view the world from a child's mind and that is exactly what this tree is, a sort of doorway into these two kids imagination. I wish that every child had this sort of imagination, I know I did and still do and maybe that is why I will never really grow up. I just wanted to show you a little more of the magic that is located in St. Louis and make you feel like a kid again. I hope you enjoy these photos as much as I enjoy passing this tree from time to time.
Thanks,
RobbinZombie
Saturday, August 13, 2011
Coolest Tattoo Video
Yesterday, I read about this video on GeekDad, one of my favorite blogs (even though I don't have kids and I'm not a guy ;) ). I can honestly say that I have a thing for tattoos, I love watching people get tattoos, I love watching shows and documentaries about tattoos, and I love looking about random peoples tattoos. Unfortunately, right now I don't have any, but very soon I am planning on getting my very first tattoo, sometime around September 15th.
Anyway, back to the video. I just wanted to share this with everyone because it is an original idea carried out awesomely. I mean how can you beat an animated tattoo, the only problem with one is that technology is constantly changing and you never know how long 1 type of technology will last, but this tattoo is forever (still awesome though). Watch the video and be AMAZED.
Thanks,
RobbinZombie
Cyclops Kitty!!!!
When I had decided that I wanted to open my own Etsy shop I really wanted to create unique creatures that I love and that I know other people would love to. The first creature I really wanted to make was a cyclops kitty. I have always wanted one and I know that it is something unusual, so I knew that hopefully I could sell a few. I somehow created my own pattern and I love the fact that the legs are not separately attached, but part of the piece. I love the kitty newborn eye, I definitely got that idea from my love of Loveandasandwich's newborn creatures.


I decided that I wanted to tint the ears pink, instead of sewing pink into the ears and I'm glad I did, because they are sooo cute. I also embroidered the nose and mouth. I decided to make the mouth very whimsical and almost like the Cheshire Cat's mouth.

I really love the way it turned out and I hope you do too.
Love,
RobbinZombie
Wednesday, August 10, 2011
Crafter Crush: Lanikins
It is time once again for Crafter Crush. It has been a minute since I posted about one of my many crafter crushes, so here is Lanikins. I have been in two swaps with Lanikins before the Tim Burton swap and the Tiny Stuffie Swap, but before those two swaps I had a huge crush on the AMAZING poppets she makes. The detail that goes into each one, it is just really beyond words. Here is the poppet that I proudly own, Mad Hatter:

The shirt and tie are all hand painted and the tiny fingers, EPIC. She loves Tim Burton as much as I do as well as Alice in Wonderland, and many of her poppets are Tim Burton related, such as Alice from Tim Burton's Alice in Wonderland:

The dress is perfect, that was my favorite costume from the movie I would seriously wear that dress almost everyday if I owned it. As soon as I saw the photo I knew that Lanikins made it. Lanikins is one of the coolest and geekiest crafters that I have had the pleasure of swapping with. She does have an Etsy shop, but it currently is empty, probably because she is so busy swapping. If you are really really lucky and wish on all your lucky stars you will get partnered up with Lankins.

If you go on Craftster.org you can see the many poppets created by the amazing Lanikins, I know I wish I had the amazing skills she does. I hope you enjoyed Lanikin's work as much as I do.
Love,
RobbinZombie
Sunday, August 7, 2011
Tentacle Plant Tutorial


For this project you will need:
- Pot
- Styrofoam that fits into the pot (I used the dome shaped one and just flipped it upside down, but you can use the dome right-side up too to give it a different effect)
- Polymer clay
- 3-4 packages for the tentacle
- 1-2 packages for the suckers
- Dowel rod or chopstick
- Glue gun and glue sticks
- Aluminum foil
- Wire (if making the feeder tentacle)
- Moss or colored paper (For the paper I ran it through the shredder and the crinkled it)
- Rocks or other items to weigh down the pot if it gets too top heavy
The first thing you might want to do is paint/decorate your pot, that way it is done and out of the way, but also if your styrofoam gets stuck, you won't have to worry about getting pieces of styrofoam getting in the paint.

Once you have decorated your pot, stick your styrofoam in and if it doesn't stay because it is too small, then just heat up your glue gun and glue it in your pot. Once you have your styrofoam securely in place, take your chop stick or dowel rod and shove it through the styrofoam to create the hole that it will stay in. This will also allow you to measure out how much you need and cut the excess dowel rod/chopstick off. You will need depending on how you want your tentacle to curve at least 3-4 inches that will go into the styrofoam and pot, plus what will be used to provide support to the tentacle. If you are making the feeder tentacle then you will need 3-4 inches the will go into the pot plus the length of your tentacle plus another inch to go inside the feeder part (if using a chopstick). It you are making the octopus tentacle then you will need 3-4 inches that will go into the pot, plus however much you are going to put into the tentacle itself, I used about 3-4 inches.
Once you have trimmed your dowel rod/chopstick you will need to clean your work surface to begin using your polymer clay. Make sure your wipe it down with a wet rag and a dry rag, because anything on your work surface will end up in the clay.

Once everything is clean you need to take your polymer clay (we are going to start with the tentacle color) and condition it. That means playing with it, mushing it, smashing it, basically getting it to a point where it is pliable and easy to use.

If you are using a chop stick or a small dowel rod, you will want to wrap it in aluminum foil so that you will use less polymer clay and it will bake faster. You clay should not be thicker than 1/2 inch because it won't cook.
If you are making a curved octopus tentacle, then to create the tentacle form you just need to roll the polymer clay into a cylinder with one end being the largest and gradually making the cylinder small until you reach the other end.

If you are creating a squid tentacle, then you will need the dowel rod/chopstick to be inside the entire tentacle length to provide structure and support for the feeder tentacle end. To do this you will roll out the polymer clay to the size you need and wrap the clay around the stick.

Cut away any excess clay and start smoothing out the seam the best you can. Worst case scenario if it just won't smooth right, then that side will be the side you attach the suckers to to hide any imperfections.

Next, if you are creating the feeder tentacle, then you will smoosh (technical term) your aluminum foil to the desired shape and bend your wire.

The feeder part of the tentacle is covered in two pieces. One piece for the front and one piece for the back. Each piece is rolled out to your desired thickness and then attached to the aluminum piece.

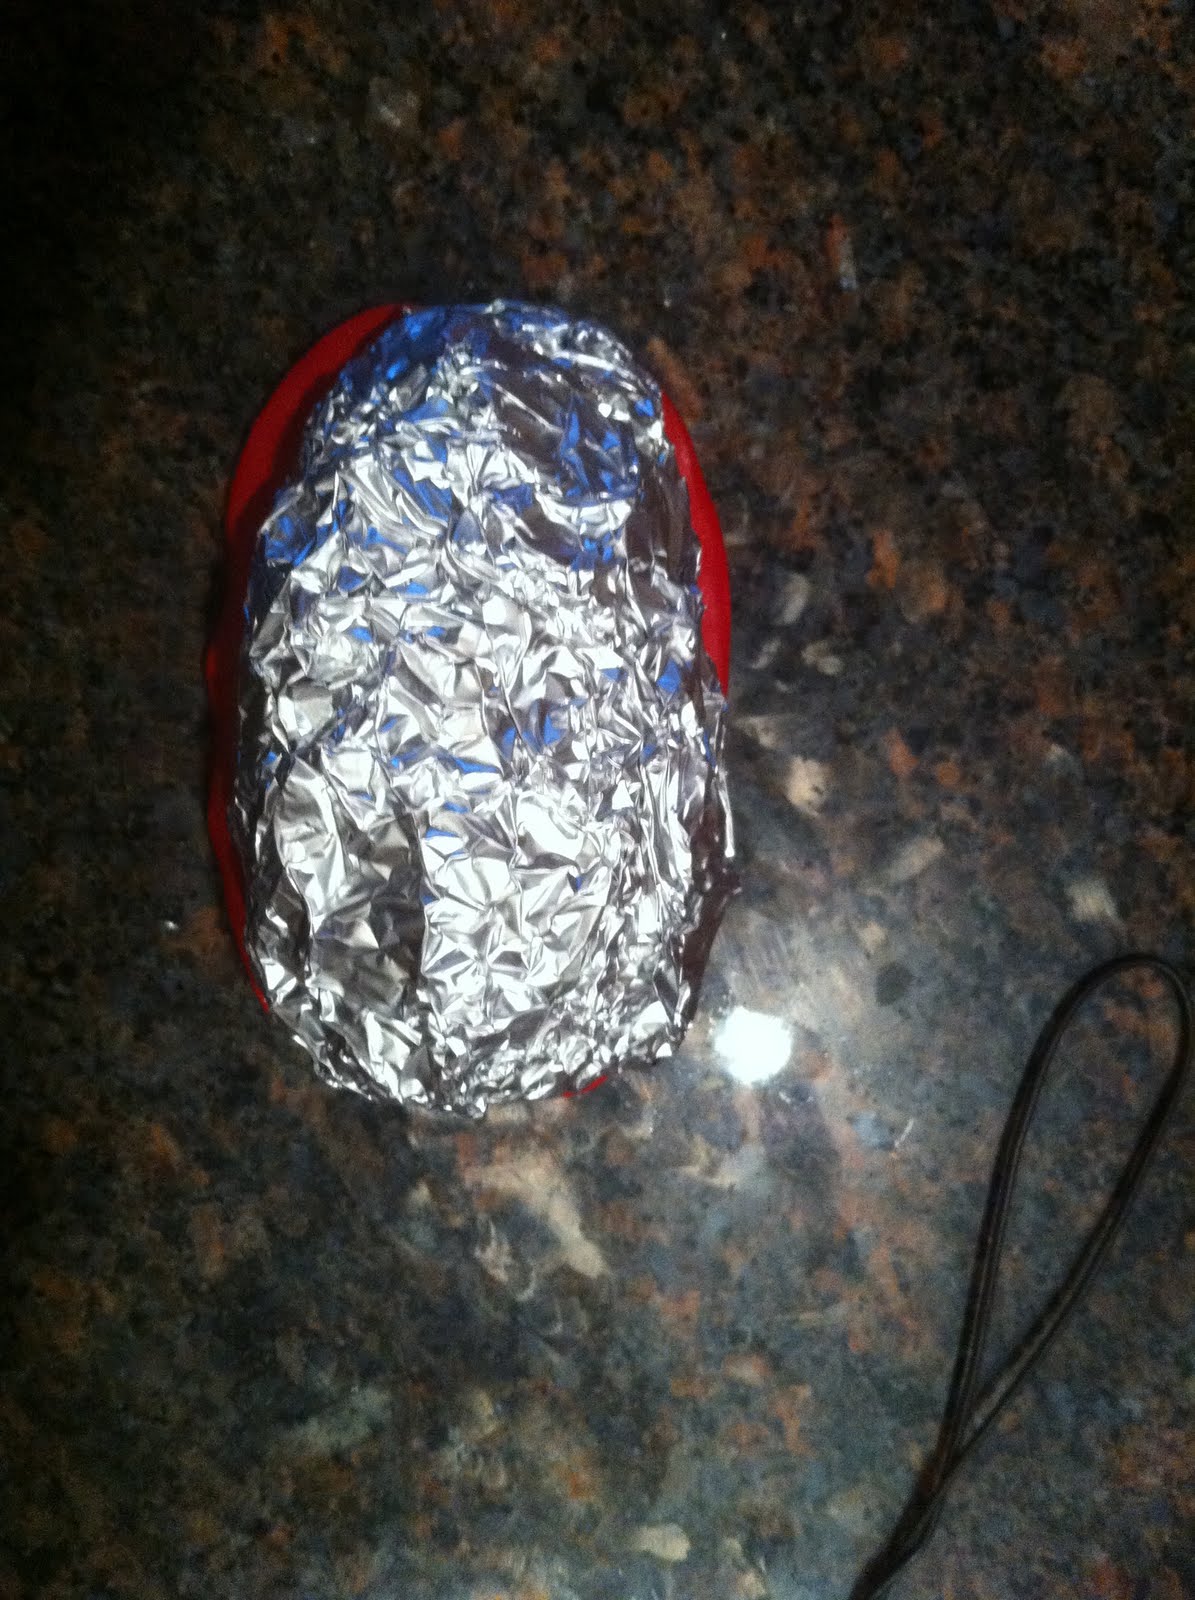


It's so SMOOTH ;)
Now attach the feeder head to the tentacle body, basically stick the wire between the rod and the clay (be careful not to perforate the sides). If you used a chop stick you can trim the clay away from the pointy end and stick that end into the feeder head and the wire into the tentacle body to create two points of contact. One point of contact is just fine because you are still going to seal the two together with clay and bake it until it's hard.


From now on the directions are for both the Feeder Tentacle and the Octopus Tentacle.
Now, we will be using the polymer clay set aside for the suckers. If you used a different color for the suckers, you need to clean off your work station as you did before, otherwise you will pick up piece and smudges from the previous color and taint your sucker color. Also check your polymer clay package and preheat your oven to the correct temperature.
Feeder Tentacle:

Roll your sucker color into 2 different size balls, the bigger ones are for the feeder head and the smaller ones are for the tentacle body. To figure out what size to roll your clay to, roll a ball and smush it a little and that is how big the sucker will be, if that is too big then use less clay. If it is to small then add a little more and do the test again until you get your desire size.
Octopus Tentacle:
Roll your suckers small to large in multiple sizes to create the gradual change in sucker size from the base of the tentacle to tip.

Now comes the fun part: Attaching your suckers.
Stick the polymer clay ball on the spot you want it to be and press a chop stick or pen tip into the middle of the ball. This will create the hole and spread out the sucker as well as attach it to the tentacle. Make sure not to press all the way through, but press a little more than halfway. You can attach them in any pattern you desire, I like to do staggered on the tentacle body because it is most like a real tentacle. Once you have attached your suckers, you will notice that some of the suckers stick out longer than others, you can press them down so that they all stick out the same length. Once you are happy with your tentacle, get out a cookie sheet, cover it in aluminum foil, and place the tentacle in its desire shape (when you are shaping your tentacle make sure that the weight of the tentacle is evenly distributed so that you won't need to put weights in your pot). If you are creating the octopus tentacle this is the point where you insert the dowel rod/chopstick into the bottom of tentacle until you hit the first curve, be careful not the perforate the sides. Stick the cookie sheet in the oven to bake. Check your polymer clay package to see how long it needs to bake for, usually it is 15 minutes.

Once it is done baking, take it out of the oven and let it cool down. Heat up your glue gun and stick the tentacle in the hole to see if you need to add a weight to the bottom of the pot, if not then take the tentacle out of the hole and squeeze a nice amount of glue on the sides of the hole and stick your tentacle's rod into the hole and let it set.

Once the glue has set, squeeze some glue around the tentacle to make sure that the tentacle is going no where.

Once that the glue has set, it is now time to decorate the foam. As you can see in the photos of the end product you can use many things to decorate, like moss or crinkled paper. I like to glue it in two layers, I lay down a bunch of glue and then grab a big handful and stick it on the foam. Once that has set I pull off any pieces that are not glued down. Then I lay down more glue in the areas where is needs more decoration and add more moss. Once all the styrofoam is hidden and the pieces that aren't glued down are pulled off, I like to trim the moss or paper so that you don't have super long pieces. When I trim the moss or crinkled paper I cut it perpendicular to the pot, because if you cut it parallel to the pot then it is all uniformly cut and it doesn't look natural. Once you have finished your tentacle plants "hair" cut you're done.

Now for the care and keeping of your tentacle plant:
It likes any light you can give it and you never need to feed it, because it eats any bugs flying around and takes the moisture out of the air for water.
Cautions: Keep small animals away otherwise they WILL become dinner!
I hope you enjoyed this tutorial, if you have any questions or if something is not totally clear, just comment below.
Thanks,
RobbinZombie
Subscribe to:
Posts (Atom)